Move Proxmox VMs & Containers to a New Storage Drive
The reasons are long so you can skip this part if you want BUT:
Reasons why you may need to do this:
upgrading to a larger or faster drive, running out of space, performance boost by migrating to SSDs or NVMe, replacing aging or failing hardware, decommissioning or removing a drive, reconfiguring storage pools or RAID setups, drive failure or errors, consolidating or organizing storage, centralizing VMs and containers for easier management, separating workloads based on performance or redundancy needs, cleaning up temporary or test storage, migrating to network or shared storage for HA or live migration, expanding a cluster with shared storage, preparing for server maintenance or upgrades, freeing up disks for replacement or reinstallation, optimizing backup and restore workflows, improving disaster recovery plans, balancing resource allocation across cluster nodes, capacity expansion for better scalability, hardware upgrade or replacement, disaster recovery, consolidation or optimization of resources.
To migrate a Proxmox VM's disk from Ceph storage to local storage, follow these steps:
Moving Proxmox VM Storage
- Prepare the VM
- Shut down the VM (optional but recommended for stability).
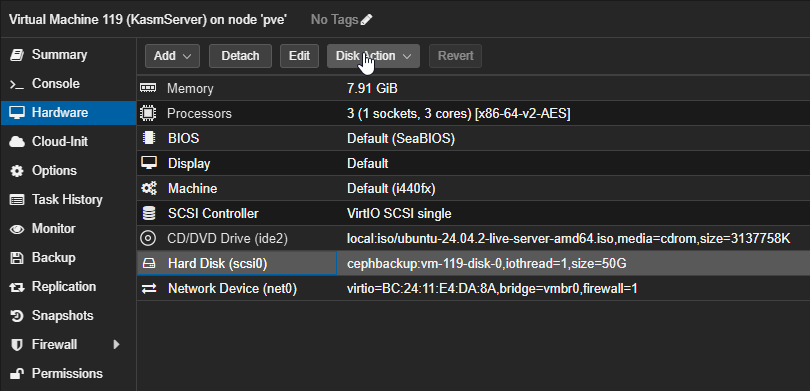
- Navigate to:
VM → Hardware → Hard Disk (e.g., scsi0).
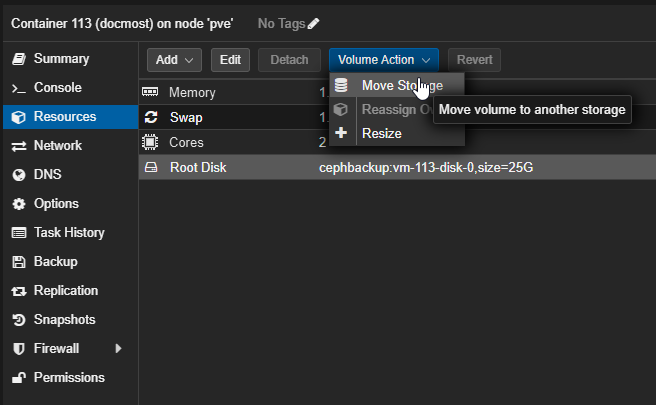
- Initiate Storage Move
- Click the "Disk Action" dropdown → Select "Move Storage".
- In the pop-up:
- Target Storage: Select your local storage (e.g.,
local,local-lvm).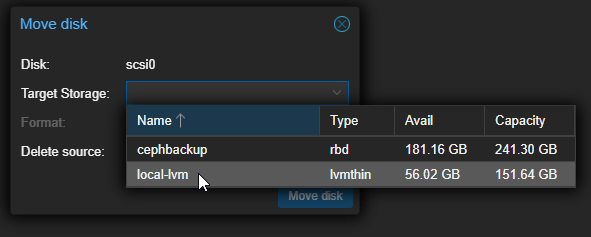
- Target Storage: Select your local storage (e.g.,
- Delete Source: Check this to remove the original Ceph disk after migration.
- Click "Move Disk".
- Click the "Disk Action" dropdown → Select "Move Storage".
-
Monitor Progress
- Track the migration in the Proxmox task log.
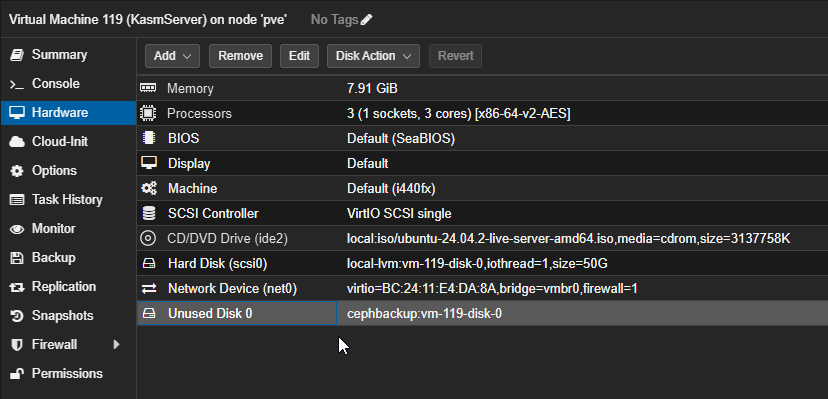
- Verify success in
Hardware → Hard Disk; the disk path should now show the local storage. - You may also see an unused disk line item, go ahead and click that and remove/delete it. You should now be able to go back to the ceph cluster and remove it or see that it has already been removed.
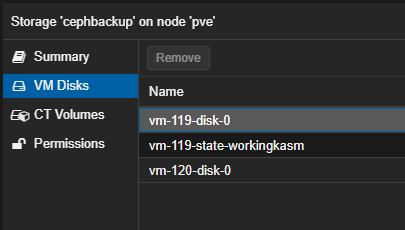
- Shown below is the VM still displayed on the Ceph pool if you do not remove it, as shown in the image above. Note that a Ceph pool cannot be destroyed or changed until all container and VM disk images are removed.
Moving Container storage
Containers are slightly different and are required to be turned off. After the container is turned off, you will need to go to the resources tab (instead of the hardware tab found on the VMs). All other steps are the exact same as a virtual machine outside of the location where the container files are stored.
Common errors
If you get the following error:
VM is locked (snapshot) (500)
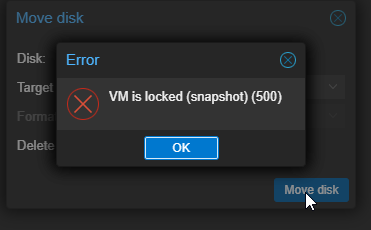
You may need to perform the following tasks WITHIN the Proxmox Shell CLI (not the container or VM CLI, the main Proxmox node CLI):
Step-by-Step Solution
-
Identify the locked VM
-
Note the VM ID (e.g.,
100) from Proxmox's web interface or run:
-
-
Unlock the VM via CLI
-
For KVM virtual machines (most common):
Example for VM ID
100:
-
-
Verify unlock success
-
Check the VM status:
You should also see on the far left of your screen that the VM no longer has a lock icon next to its name.
-
failed to update VM 119: unable to delete 'cephbackup:vm-119-disk-0' - volume is still in use (snapshot?) (500)
Make sure your VM is turned off first!
-
Unlock the VM
First, release the snapshot lock:Force-delete orphaned snapshots
If the snapshot metadata exists but the underlying storage is missing:Replace
<snapshot-name>with the actual snapshot name (e.g.,BeforeDiskUpgrade). The--forceThe flag bypasses missing storage checks.