Upgrade OPNsense ISC DHCP to Dnsmasq and DHCP
In this episode we will cover how to upgrade to Dnsmasq DNS & DHCP services in OPNsense 25.x due to ISC DHCPv4/DHCPv6 being deprecated by their developer.
What this tutorial will cover:
Update OPNsense → Disable ISC DHCPv4 → Enable Dnsmasq and DNS forwarding → Configuring Unbound DNS for recursive DNS → Test DHCP and DNS functionality
Update OPNsense to the latest
You can find the latest updates from your dashboard screen under the system information tile:
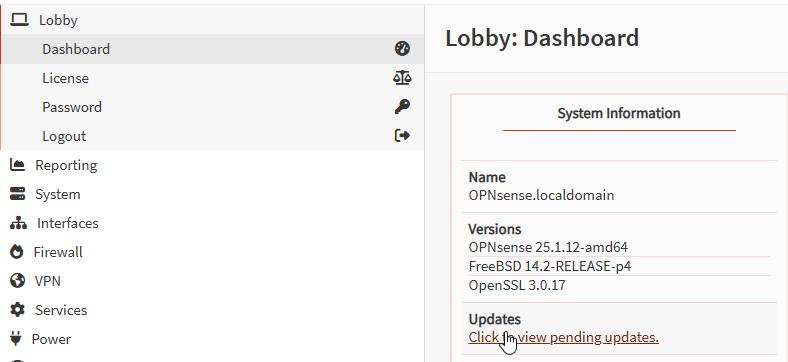
After you check for updates, go ahead and update your system be following the install wizard.
Download Static DHCP Mappings
Perform a backup of your OPNsense settings under System > Configuration > Backups.
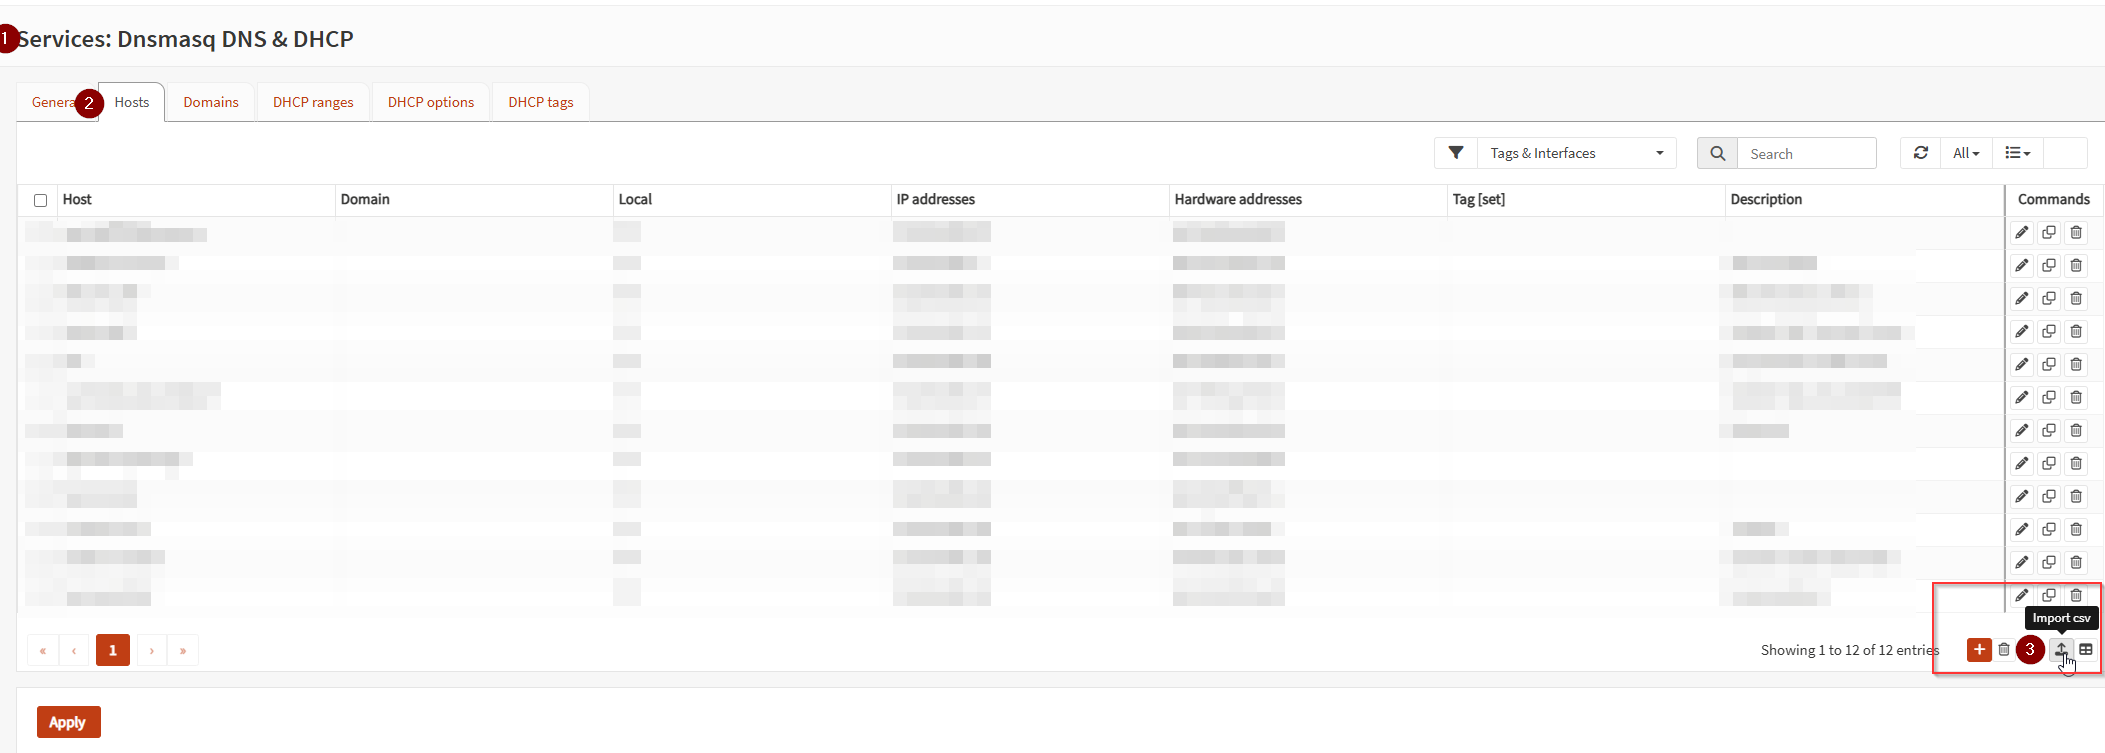
Before we upgrade from ISC DHCP, we can download a CSV file for all our static mappings under: Services > ISC DHCPv4 > LAN
Setting up Dnsmasq DNS & DHCP
We are going to change the following settings under: Services > Dnsmasq DNS & DHCP > General
- Set interfaces: LAN
- Set listen port: 0 (this allows Unbound to do all DNS queries)
- Set Do not forward to system defined DNS servers: Checked (enabled), (this setting prevents local hostname resolution from being forwarded out of your network).
- Then click apply at the bottom.
IPv4
Now move over to the DHCP ranges Tab found at the top of your current window
- Set Interface: LAN
- Set Start address: 192.168.1.2 (or whatever your sub domain network is for the third octet).
- Set End address: 192.168.1.254 (or whatever your sub domain network is for the third octet).
- Set description: (Describing what this subnet is for)
- Click save
IPv6
To set IPv6 perform the following.
- Set Interface: LAN
- Set Start address: ::1000
- Set End address: ::2000
- Set Constructor: LAN
- Set description: (Describing what this subnet is for)
- Click save
Now move over to the Hosts tab and we can upload our static ISC DHCP mappings here from the earlier step where we downloaded the .csv file.
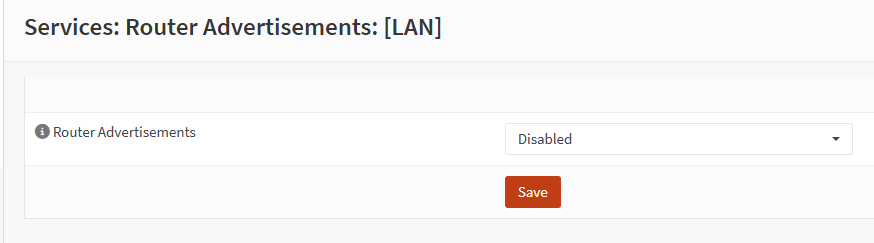
Disable Router Advertisements
Under services > router advertisements > LAN, set the router advertisements to disabled and click save.
Disable ISC DHCPv4 / DHCPv6
Now we have set the proper settings to be able to disable our legacy ISC DHCPv4/v6 Under services > ISC DHCPv4/v6 > LAN.
(you need to make sure you are quick with this step, you do not want your DHCP lease to expire on your machine, this would prevent you from connecting to your OPNsense box. If that happens, you will need to manually assign an IP to your host machine, along with the other respective networking settings within your operating systems Ethernet/Wi-Fi settings menu.)
- Set Enabled: unchecked
- Click save
Enable Dnsmasq & DHCP
Now that we disabled that, we need to enable the new replacement under services > Dnsmasq DNS & DHCP > General
- Set Enabled to checked (check mark showing in the box).
- Set apply at the bottom.
How to set DHCP reservations in Dnsmasq DNS & DHCP
Under services > Dnsmasq DNS & DHCP > Leases, you will find all your hosts and their dynamically or statically assigned addresses. When you select the + icon to the far right, this will allow you to statically assign that address to the host machine, you can just add a description or comment and click save.

Conclusion
There you have it, your new updated DHCP leasing is working with the latest OPNsense 25.x DNS and DHCP service!
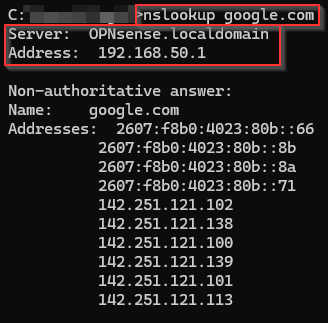
We have also confirmed DHCP is working by seeing a list of hosts in the previous step, we can also ensure Unbound DNS is still working by performing the following command in our devices terminal/command line:
You should see your local OPNsense machines IP resolving this for you:
As the picture shows below, we can see that OPNsense and our local address (unbound DNS found where this website was being issued to us from).