I Made My Mikrotik AP Fully Managed by OPNsense – No More DHCP Chaos
WinBox Mikrotik AP Overview
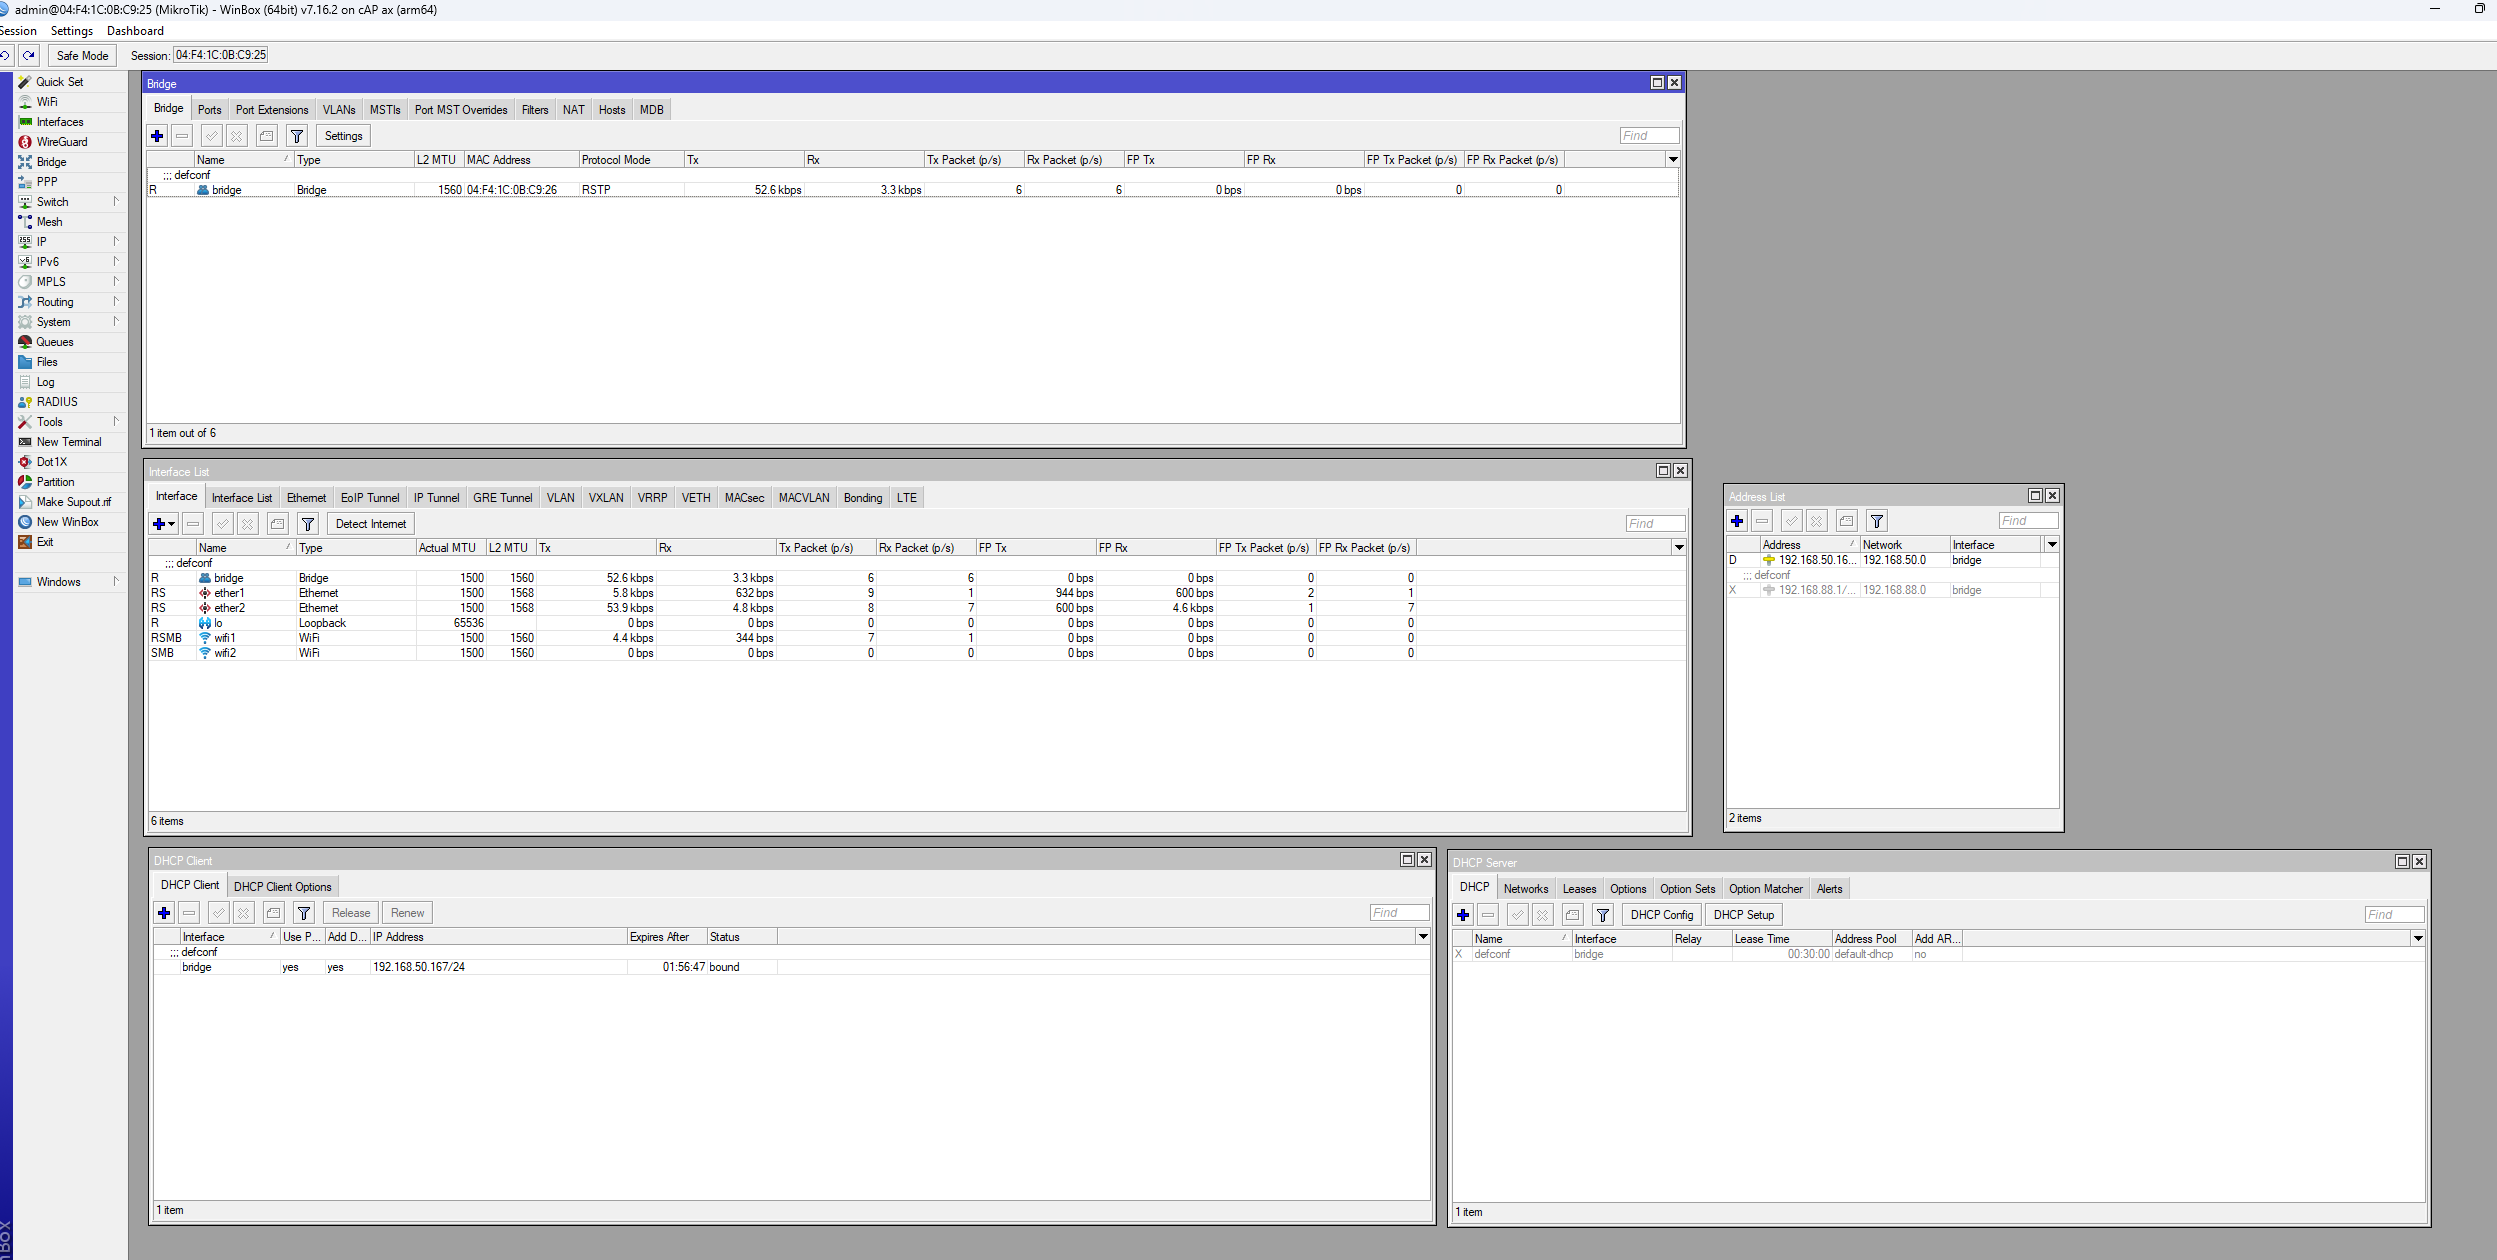
Please see the image below, this will show you all sections (tabs) you need to have open, in order to perform the tasks found in this video.
Configuring your Mikrotik Wireless Access Point to get DHCP leases from your root DHCP server (OPNsense)
- Login to your Mikrotik Access point with a direct Ethernet Connection to your PC with the MAC address found on the sticker on the bottom of the access point (the login credentials will be found there too)
- We are going to open the bridge tab
- Under the bridge menu, go to the ports tab.
- Add all interfaces under here, you should just need to add ether 1 to BRIDGE if you have the default config setup.
- Go to the interfaces list window
- Under the interfaces window ensure the interfaces list tab has LAN set to bridge and WAN set to ether 1 (because we have the internet access connected to Ethernet 1)
- Open DHCP Client under IP →DHCP Client
- Create/Set the DHCP client to the interface bridge
- Open DHCP Server under: IP Tab → DHCP Server
- Disable the DHCP server
- Go to the Networks tab under the DHCP server window and disable that too
- Open the address list under IP → Addresses (verify that you get the correct network for your homes network)
- Configure Wi-Fi networks and settings under the Wi-Fi tab. (Here you can double click and set the SSID, band, channel width, passphrase, authentication type, under the configuration, channel, and security tabs)